Page 1 of 2
Tips on track laying

Posted:
Sun Jul 22, 2012 1:53 pmby dfcfu342
I've been lurking here for a long time (sorry Hawk

) and have decided to take the challenge of building a route. I have a decent amount of decals placed but I just can't seem to get the track to go where I want it to go so to speak. I'm having trouble getting straights to line up with the decals without having to adjust the direction slightly every few lengths of track.
Does anyone have some tips on laying straight track or just general track laying tips?
Thanks for the help now and in the past, I've learned a lot from this community.
Re: Tips on track laying
Posted:
Sun Jul 22, 2012 6:28 pmby Bananarama
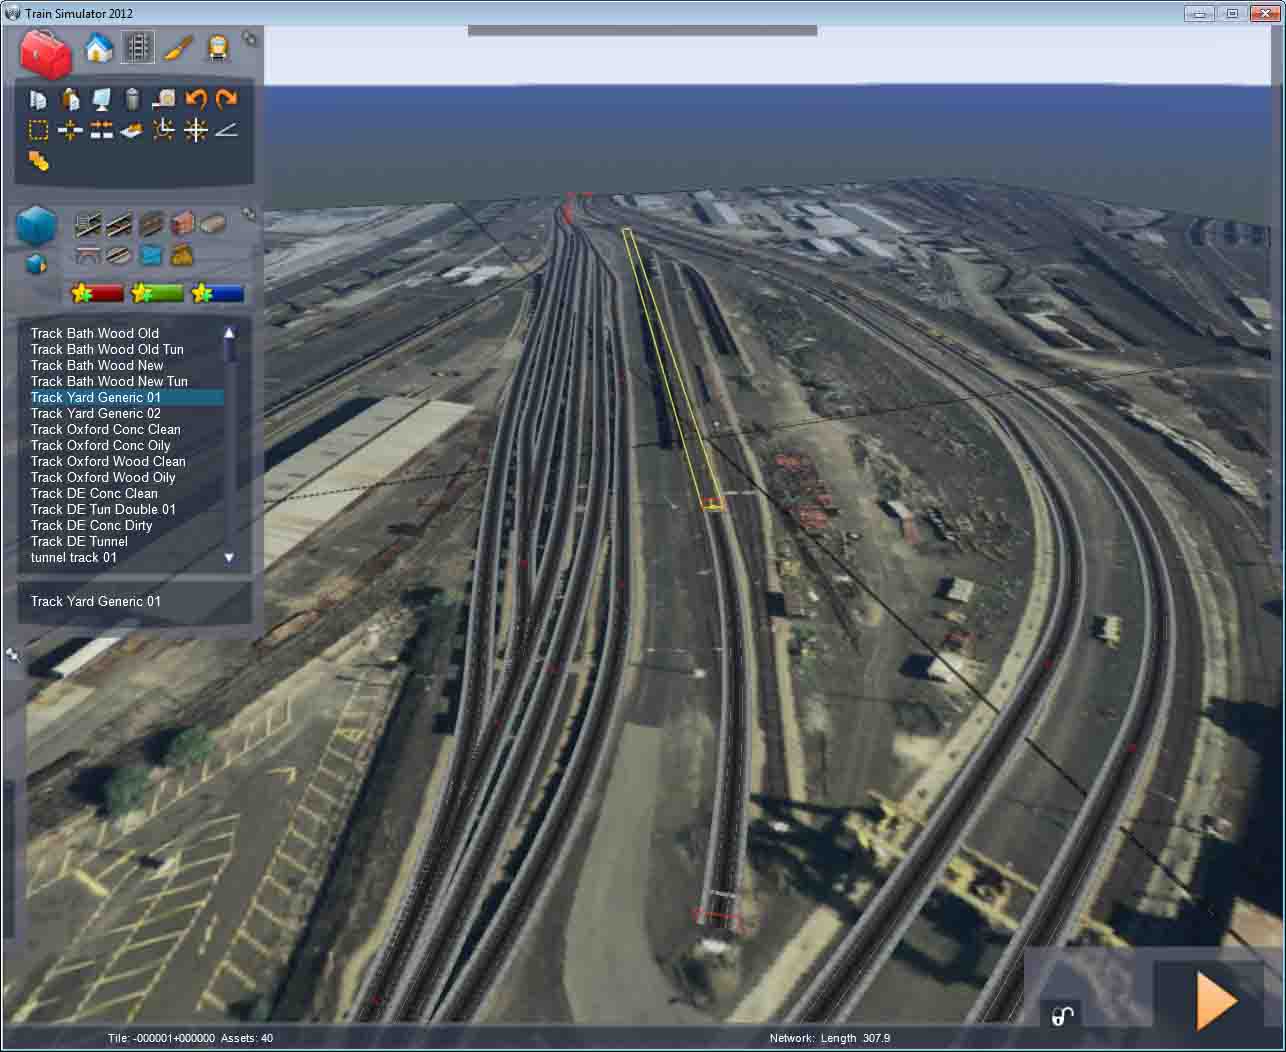
Uncheck the snap-to-track icon in the lower-left menu of the editor.
Re: Tips on track laying
Posted:
Tue Jul 24, 2012 1:57 pmby dfcfu342
Hack wrote:Uncheck the snap-to-track icon in the lower-left menu of the editor.
Thanks! That helped out quite a bit. I'm having a lot of trouble laying yard track, nothing seems to want to connect to anything no matter what settings I try. Laying the yard track is proving to be an excercise in some serious frustration.

Re: Tips on track laying
Posted:
Tue Jul 24, 2012 2:04 pmby artimrj
Try turning off snap track to terrain to get them to connect.
Re: Tips on track laying
Posted:
Wed Aug 08, 2012 5:25 amby Vainte
I'm also just starting my first attempt at a route and having similar problems, not trying to hijack the thread hopefully we can both learn from the answers. Specifically, when following a decal curve, I have to stop the piece of track because the curve stops matching reality. I try to stop it aligned correctly, but when I try and add the next straight section, It's off by a few degrees. So I delete the curve and try again, but too often I'm wrong one way or the other. I see so many beautifully aligned yards, is there something I'm missing?
P.S. I'm still enjoying myself, this could get addictive:)
Re: Tips on track laying
Posted:
Wed Aug 08, 2012 8:40 amby PapaXpress
Working from memory here...
I would lay the straight pieces first. In the Multi track box put in 8. Then move them over latterly to where you want them. If they need to be turned to left of right slightly, select the end (not the middle) of a track section and use the F and G keys. Wherever you see the positioning gizmo will be your pivot point. You can also do this with multiple tracks at a time using Ctrl + Click, and selecting the end (or where ever you want the pivot point to be), and using F or G to turn them.
Re: Tips on track laying
Posted:
Wed Aug 08, 2012 10:38 amby Bananarama
I do similar - laying as many as 32 side-by-side, connecting curves, adding switches, and finally deleting what's not needed.
Re: Tips on track laying
Posted:
Wed Aug 08, 2012 6:12 pmby Vainte
Thanks guys, that info is already helping. My goal is a small imaginary route now, just something to cut my teeth on while I learn the best ways to do various things.
Re: Tips on track laying
Posted:
Wed Aug 08, 2012 7:36 pmby PapaXpress
Good to hear. Just remember to have fun, and backup your files often.

Re: Tips on track laying
Posted:
Thu Aug 09, 2012 7:02 pmby dfcfu342
You were right viante I'm learning too this was some helpful info and might be enough to get me back into working on my route again

Thinking about releasing it to the community but I'll decide that later on down the road.
Re: Tips on track laying
Posted:
Sat Aug 11, 2012 7:56 pmby dfcfu342
I'm having trouble getting some switches to disappear after removing excess track. I accidentally over lapped two pieces too far and I deleted the extra hanging off the end as well as the switch stand but on the 2D map it still shows as a useable switch but it's obviously stuck in the only direction possible. How do I delete this?
Re: Tips on track laying
Posted:
Sat Aug 11, 2012 8:07 pmby PapaXpress
You have a stub of a track hiding there. Sometimes you can hover over it to highlight it and delete it. Another trick I use it to click on the elevation tool (yellow arrow pointing up) and find the end of the track that way, pull it upward so I can delete it. I have heard other people claim that they needed to look under the track to get at it.
Re: Tips on track laying
Posted:
Sun Aug 12, 2012 5:13 amby thebigroyboyski
The method I've been using for getting curves to line up with straights is to lay the curve then trim it back with the cut tool a little at a time until the straight matches the decal.
Re: Tips on track laying
Posted:
Sun Aug 12, 2012 8:24 amby PapaXpress
Sometimes the photo (not the decal) is shifted a bit, so following the curve is not always possible. In this case you have to average it out. Lay the straight track first, and make sure its the same height as the curve you want to join it to. Remember that if you need a tighter curve you can change the track type in the right fly out (main, yard, freight, passenger) and experiment which one will get you the curve you need. If you need a tighter curve we can talk about cloning the track rule and altering its values. Its more advanced, needs RW Tools, but is not too complicated to get working.
Re: Tips on track laying
Posted:
Thu Aug 23, 2012 11:06 amby dfcfu342
Need a little more help fellas

I was watching amtrak505's video on laying track and he was placing some sort of marker that allowed him to adjust the track heights after laying it. They were yellow arrows that pointed directly vertically. What are these called and where do I find them? The video was in fast forward so I couldn't follow everything.