So you have your route, and you have your starting point, zoom in in Google Earth to where you can see and trace the tracks clearly.
In Google Earth, there is a function that will create a path, called "Add Path" on a default installation, this will be somewhere along the top, just above the 3d view. If you click on that icon, a box comes up displaying stuff about what to name your path, etc. Move this to the side, but keep it open. When you create your path, you click and a "point" will be created, and a line drawn between multiple points. A good method now, is to trace the Railroad tracks with these points, clicking at each key area. It is recommended, that you be able to distinguish where a switch is, what is double tracked, where a turn starts and ends. This will help tremendously when laying your track in the route editor.
When you have finished marking all of your track, name the path in the window that came up earlier, and save it by pressing "Ok". Next, find the path in the left sidebar named, My Places, and right click on your path. Choose to "Save Place As" and save the file to any location of your choosing, as a *.kml.
Your next step is to convert this to a RailWorks format.
Open RWTools, and find "Route Building Tools" and Navigate to, Markers>Convert Marker files. You will get a popup saying that you should save this in your RouteMarkers folder, contained in your Source>Developer folder.
If you do not have a Source folder, Navigate to:
Route Building Tools> Set up Developer folder, and also, set up sub Folders.
If I were creating a route like Soldier Summit, my Developer folder would be Trainguy76, and title for Sub Folders would be Soldier Summit Route, or something that makes sense to you (This goes inside your Developer folder). In one of these functions, you will get asked if you want a corresponding folder in Assets too, click YES. If you do not get this, when the folders are created, copy your Developer folder into your Assets folder in your main RailWorks installation.
-Back to RWTools
After you get the popup saying that you should save the .csv in your RouteMarkers folder, contained in your Source>Developer folder, navigate to first your .kml file, and then click ok, and then navigate to your Developer sub-folder (Which is inside your Source folder) called RouteMarkers, save it in there. Before doing this though, change the color in the three sliders to something that will stand out to you in RailWorks.
Next, Navigate to Route Building Tools>Marker Files>Convert Files Direct to .dcsv. You must select your .kml file again, and this time, navigate to your Assets>RouteMarkers folder, and put it there, with the same color you did before.
After this, start RailWorks, and clear the Cache (In the settings tab). Open your route in RailWorks, and then switch to the editor.
When you get to the editor, click the blue cube in the middle left flyout, and a right hand flyout will appear. Navigate to your folder, and check your assets box. After you have done this, go to the bottom left flyout, and select the icon that looks like a compass. YOU WILL NOT SEE ANYTHING. Next, close RailWorks, and restart it and enter your route in the editor, make sure the icon is ticked. And you should see your path.
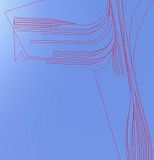
Your result can look like this, if you were looking skyward from underground.

